In expectation of more winter storms and snow, New Jersey art educator Lori Decoite designed this adorable toboggan craft for her energetic second graders! While not originally called for, we think this project would also make the perfect opportunity to recycle some of those empty toilet paper or paper towel rolls you have lying around the classroom.
Photo Source: Almost Unschoolers | Be sure to cut through both sides to create two halves.
Supplies You'll Need (...you can find them at our site!)
Empty toilet paper roll cut in half lengthwise (shown right)
Before beginning, Decoite suggests having all the major pieces cut out, that way your students will be able to focus on assembling and decorating. She prepared the toilet paper roll halves, 4" x 6" brown construction paper sleds, 2" x 2" multicultural construction paper heads, and 3.5" x 5" assorted color construction paper jackets.
To Assemble:
Place a small line of glue along one edge of the recycled paper roll piece. Attach one end of the craft paper sled (the side measuring 4") to the roll and hold firmly in place, letting the glue adhere. Add another line of glue where the other edge of the roll meets the construction paper and hold in place. This will create the traditional "lip" or curl at the front of the toboggan.
Photo Source: Canadian Canoe Routes | Scott Killarney
Set the toboggan aside to dry.
Trim the edges of the 2" x 2" piece to create a more realistic head shape. Use fine-tipped markers to add facial detailing and hair. You might also consider using yarn or curled paper clippings to create fun hair designs.
To create the jacket, cut two slits about 1/2" from each edge (along the 3.5" side) and about 3" in length (see diagram below - each cut is signified by a dashed line).Shape the top of the jacket to create shoulders, then use fine-tipped markers or construction paper scraps to add detailing.
Glue the sledder's head to the jacket and create winter clothing using construction paper or fabric scraps.
Attach the sledder to the toboggan, gluing the bottom edge to the sled and leaving the arms free to glue to the top of the toboggan lip.
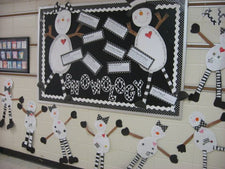
Optional: Use white bulletin board paper to create a sledding hill and place all your students' toboggan crafts on display!
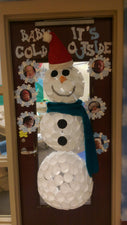
This is a great winter craft - especially when coupled on a lesson about toboggans, a creative writing exercise on students' favorite sledding experience, or another winter project!


 Shape the top of the jacket to create shoulders, then use fine-tipped markers or construction paper scraps to add detailing.
 Shape the top of the jacket to create shoulders, then use fine-tipped markers or construction paper scraps to add detailing.