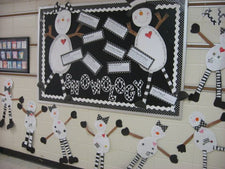
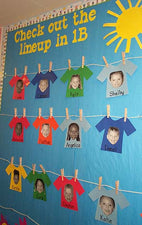
Whose Teeth Are These? - Interactive Dental Health Bulletin Board Idea

February is children's dental health month and to go along with this important topic we found a great interactive bulletin board idea {from Mrs. Guntorius' Kindergarten Class} that will put your student's "pearly whites" on display and provide some exciting classroom fun - for students, staff, and parents alike!
"Whose Teeth Are These?"
Before the final board can be put together, you'll need three important elements for each student in the classroom.
- A {photo} head shot. Have a photo shoot at school or invite students to bring in a close-up of themselves.
- A {photo} tooth shot. Whether taken in the classroom or at home, you'll need a picture of each student's teeth (and just their teeth).
- A clue worksheet. Each student must provide three clues about themselves to help their classmates, etc. match the picture of their teeth to their photo. See the example worksheet and clues below.


Interactive Dental Health Bulletin Board
- Background: Red bulletin board paper.
- Title: "Whose Teeth Are These?"
- Border: Mrs. Guntorius used a spring ladybug border, but you might also consider stringing together paper tooth cutouts with dental floss for a more unique look.
-
Decoration:
- The Photo Placement. Student head shots should be placed in the middle of the board, while the teeth shots and clue worksheets (which would look nice mounted onto a colorful piece of construction paper) should be arranged along the edges of the board.
- The Interactive Matching Component. There are several ways in which you can create an interactive experience. A] Attach the head shots to the board using Velcro or magnet strips. Add a second strip somewhere on each of the teeth shot/clue worksheets so that students can make guess matches. B] Attach the head shots to the board using Velcro or magnet strips. Add an envelope to the bottom of each teeth shot/clue worksheet so that students can make guess matches by putting the photos in the envelopes. C] Cut long pieces of yarn (one per student), knotting a small loop at each end. Use a tack to place a piece of yarn under each student's picture and add a second tack somewhere on each teeth shot/clue worksheet. Students will then make guess matches by tacking the free end of the yarn to the proper photo. Remind students to place the photos/yarn pieces back in the center of the board when finished so that the next student will start with a "clear" board.
Thanks so much for stopping by! We'd love to hear how you promote dental health in the classroom, so be sure to leave us a comment below!


